I may decide one day to go back to writing about my garden. Until then you can visit me on Facebook for occasional posts related to gardening and cooking.
Happy gardening!
Renee
I may decide one day to go back to writing about my garden. Until then you can visit me on Facebook for occasional posts related to gardening and cooking.
Happy gardening!
Renee
If you’re a gardener looking for new plant and design ideas (or if you’re just looking for something to do outdoors on one of our few remaining ‘spring’ weekends), put the “Inside Austin Gardens Tour” at the top of today’s to-do list.
This year’s tour, which runs from 9 am to 4 pm., is subtitled “Gardens Eclectic” and is intended to showcase local gardens that are a unique expression of the personalities and interests of the gardeners who created them. After previewing each of the gardens last week with a group of Austin garden bloggers, I can confirm that creative individualism is alive and well in Austin gardens.
All of the gardens make good use of a mix of native and adapted perennials and annuals, but the hardscapes (the ‘bones’ of the gardens) say the most about the personalities of the gardeners.
Take, for example, this flaming water rock garden scene from Jerry Naiser’s garden. If it were performance art, I’d call it ‘Fire Water Steel Rock.’
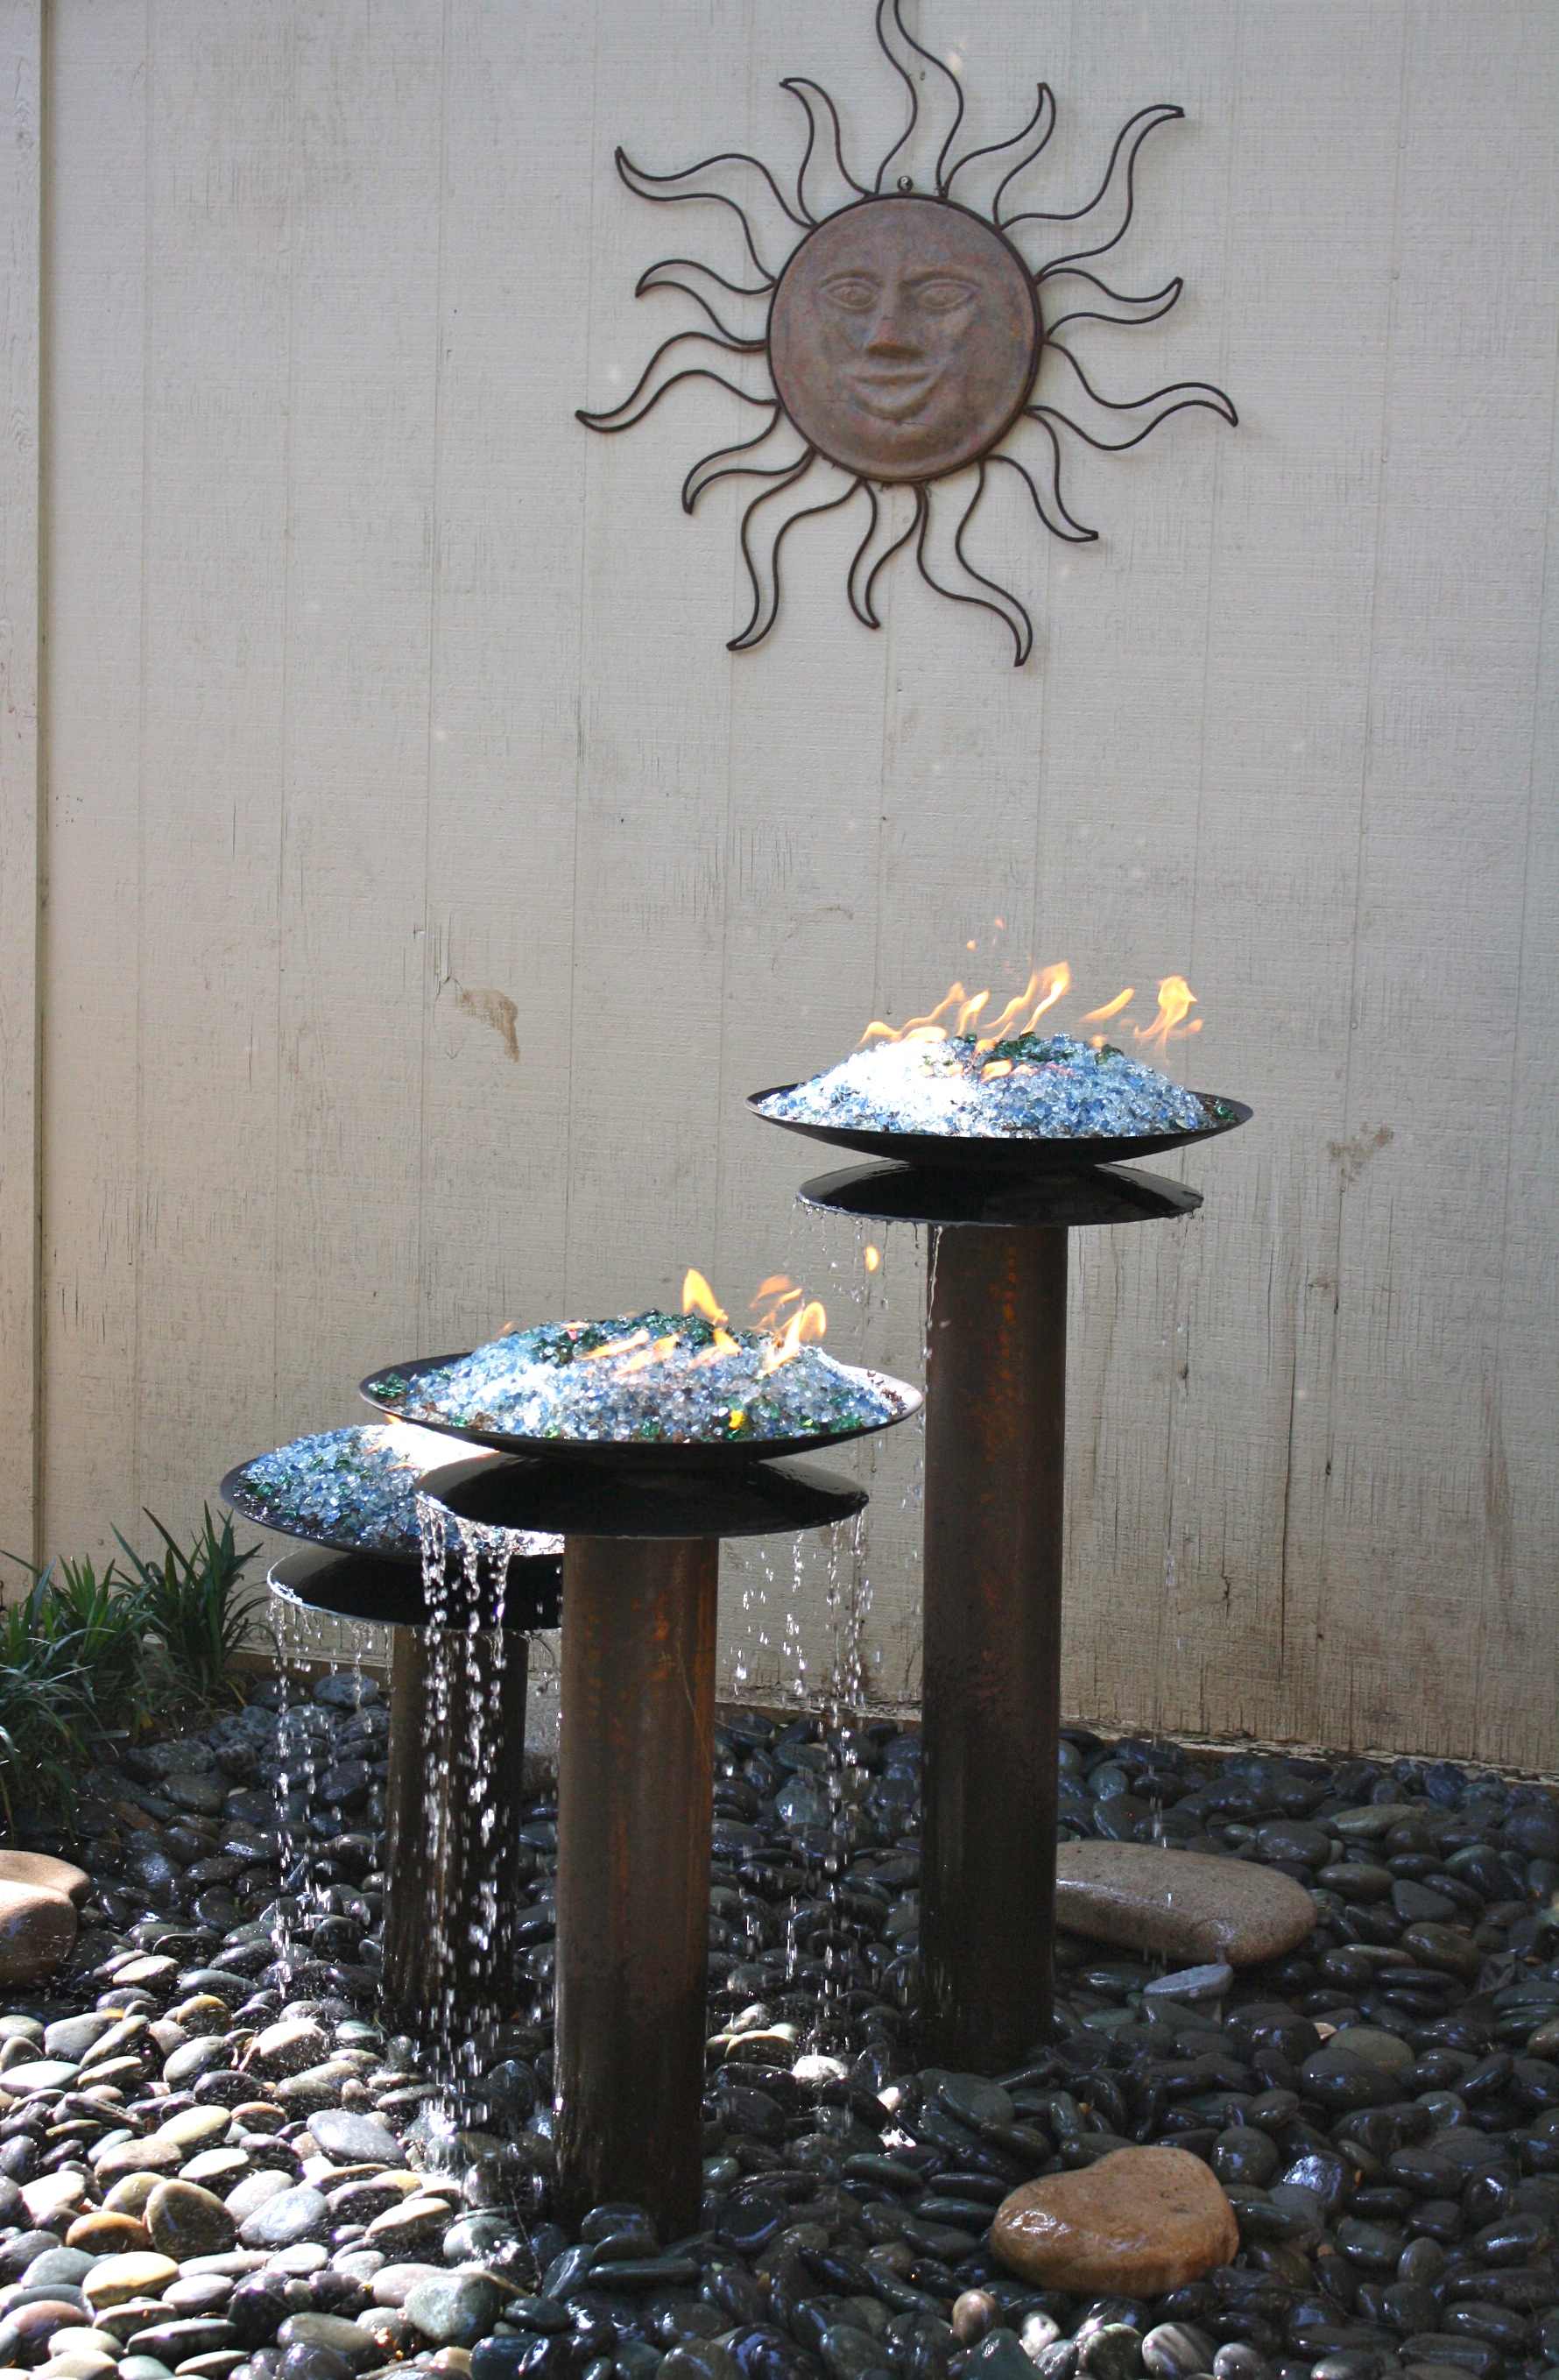
I’ve heard of flaming rock bowls, and I’ve heard of flaming water, but this was the first time I’d seen the two concepts combined for a garden feature. It’s certainly one way to add drama to a backyard suburban garden.
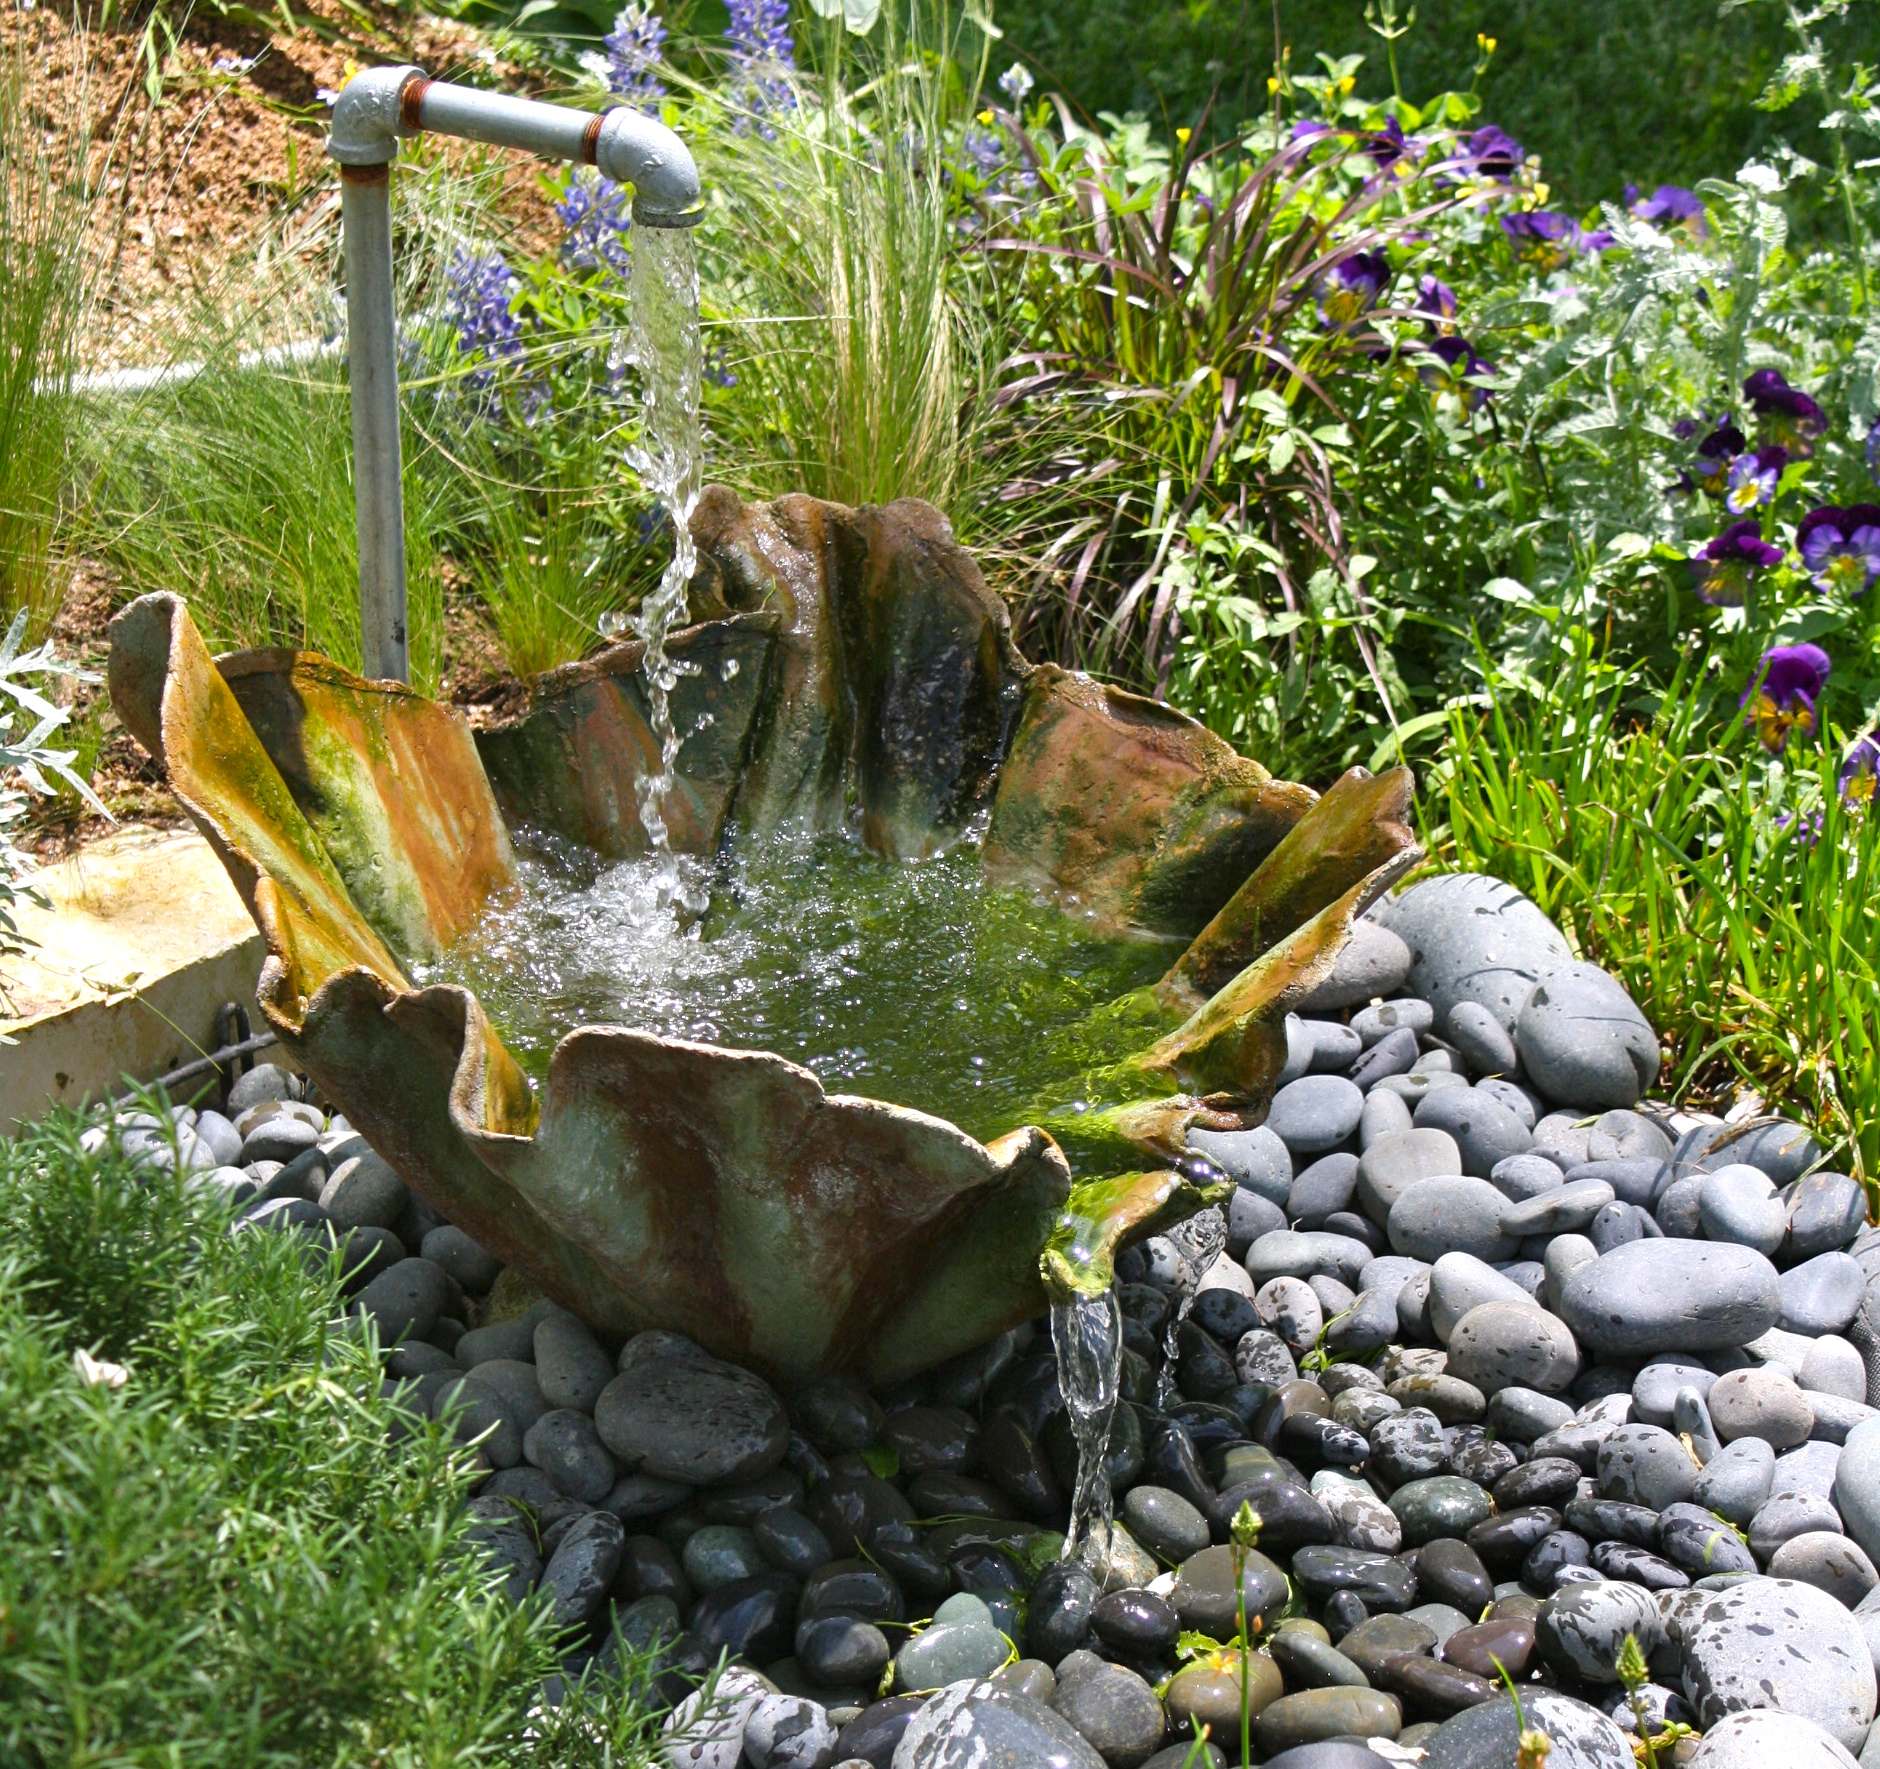
The water feature in Lori Daul’s garden is not as showy perhaps, but it’s a lovely (and cooling) combination of plumbing, pottery and river rocks that provides soothing sounds and a peaceful place to rest the eyes in this small South Austin garden.
Ken and Robin Howard Moore brought a personal aesthetic and piece of the past to their walkways:
 Regional brand imprints and burnished shades of red and yellow suggest that these bricks witnessed a long and colorful history before they found a home in the Howard Moore garden.
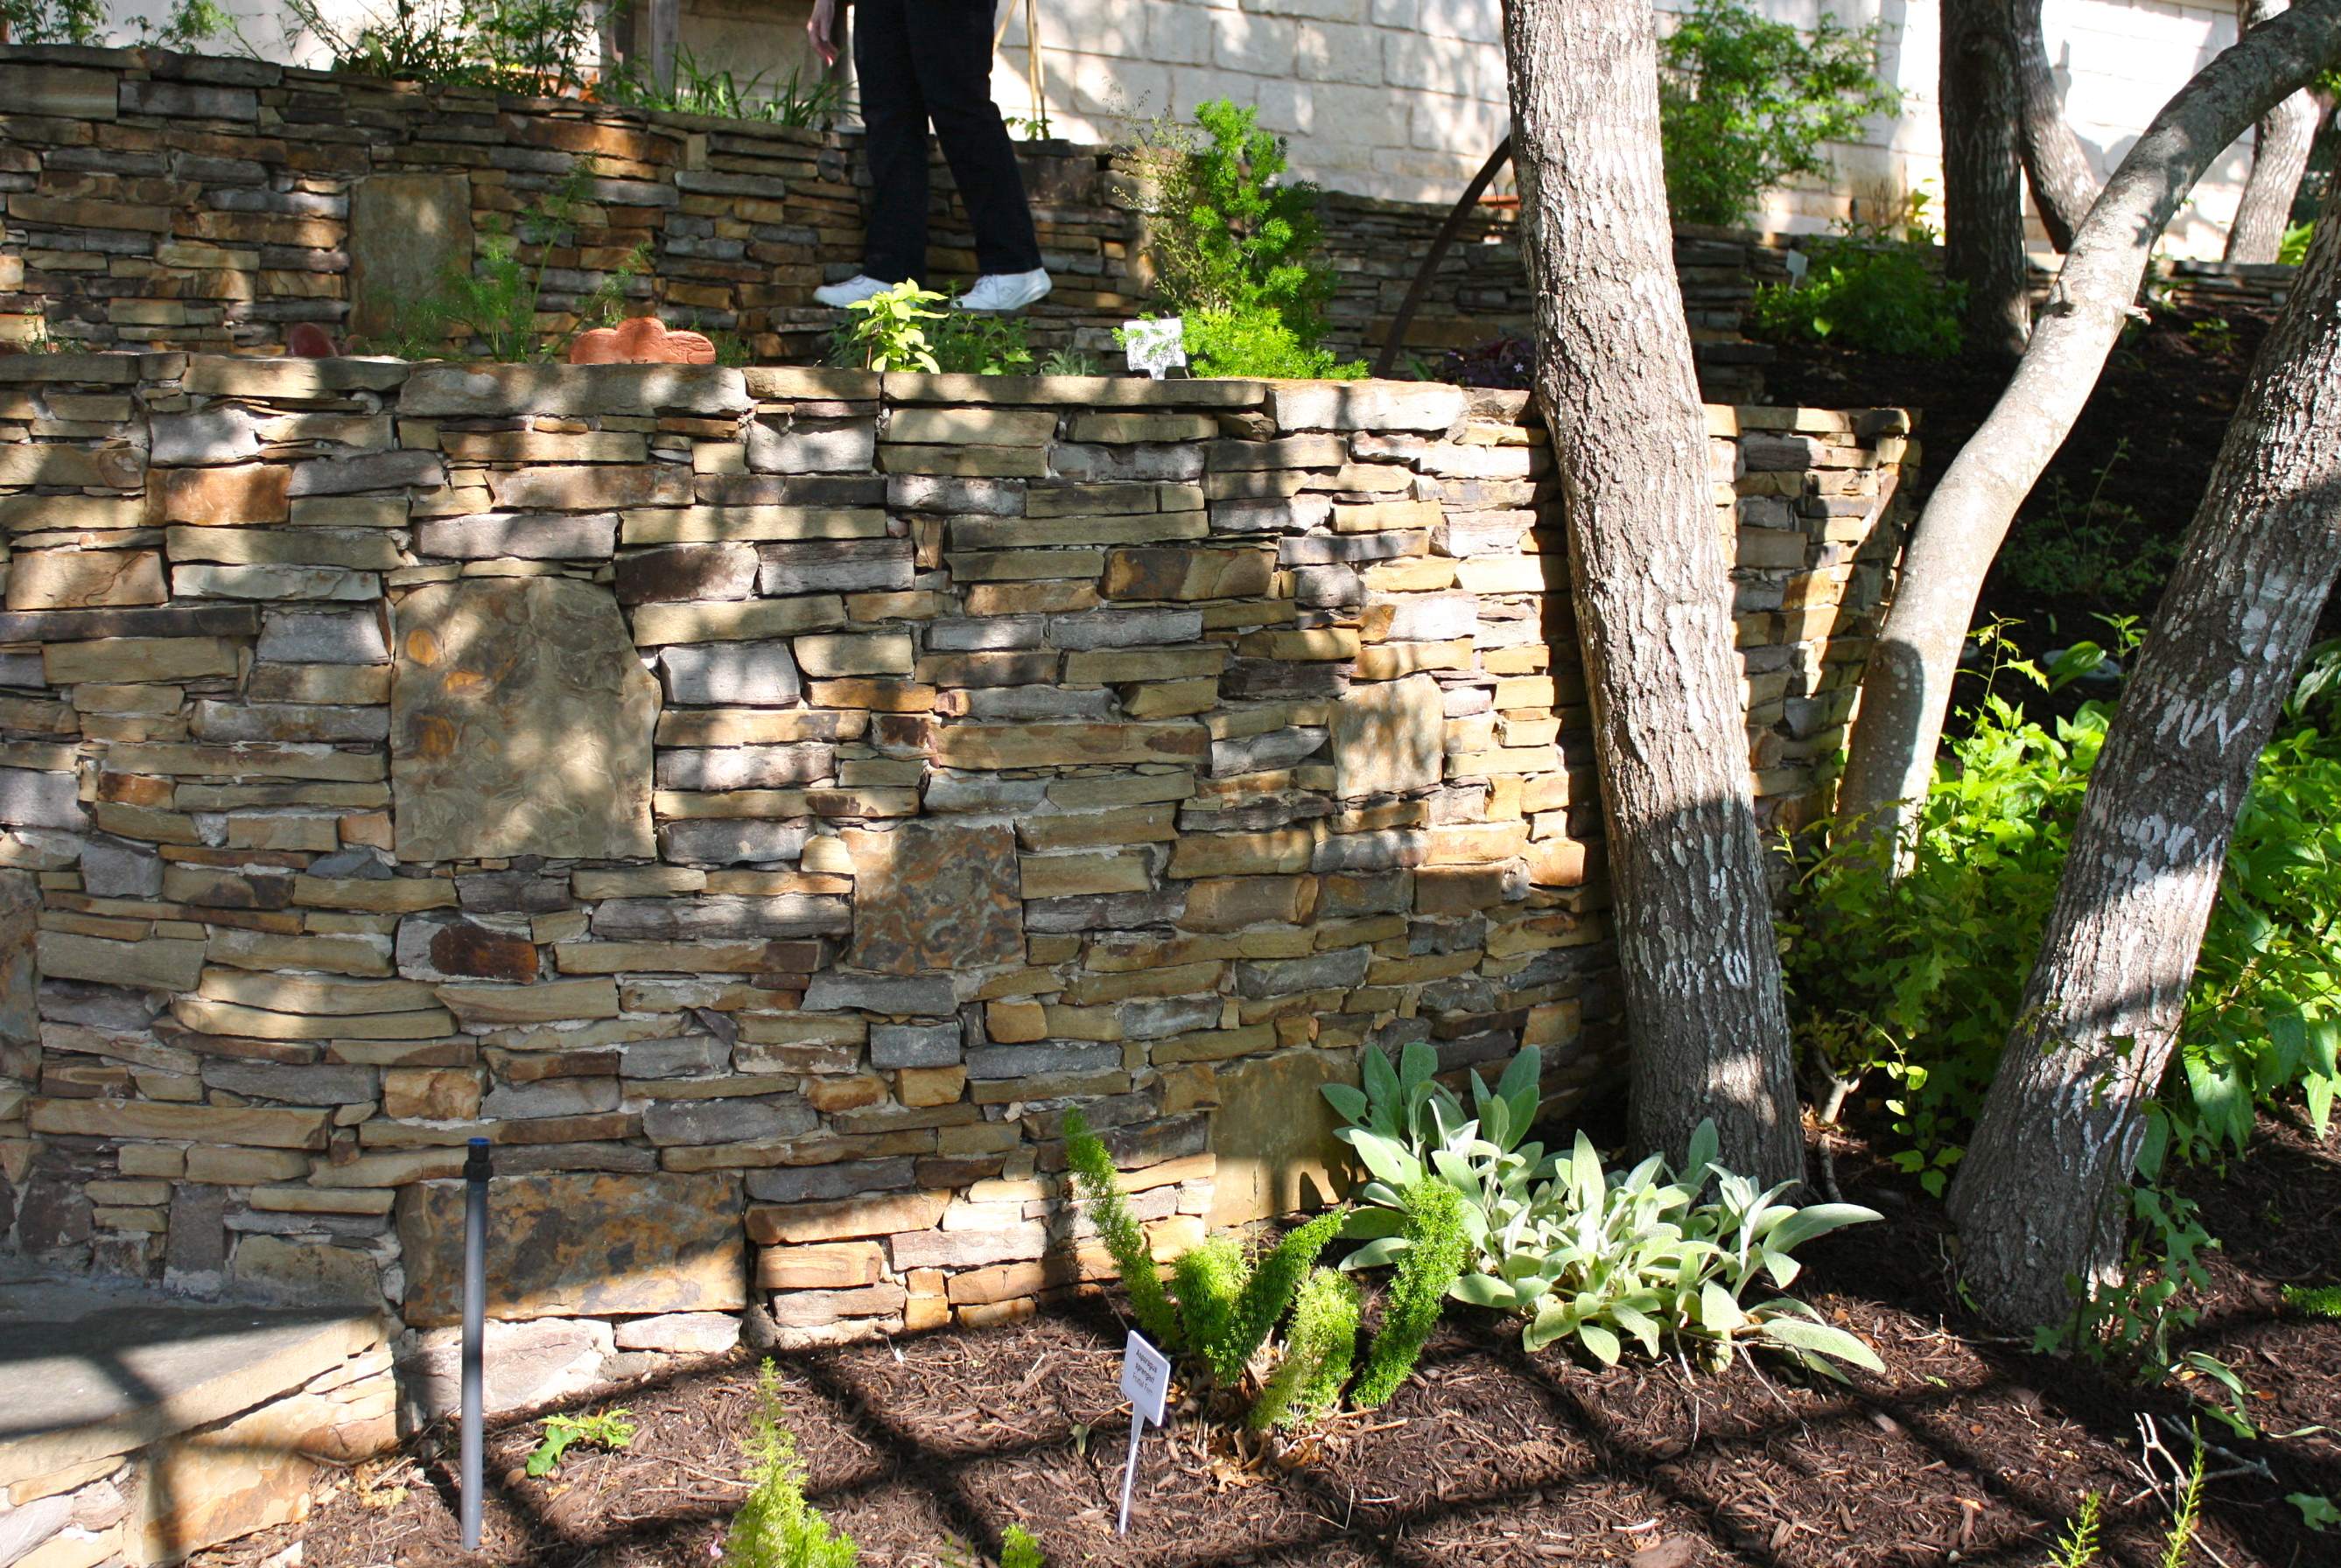
On Dugie and David Graham’s steep backyard slope, stacked rocks create walls to form a foundation and a frame for sub-level garden rooms and a pond.
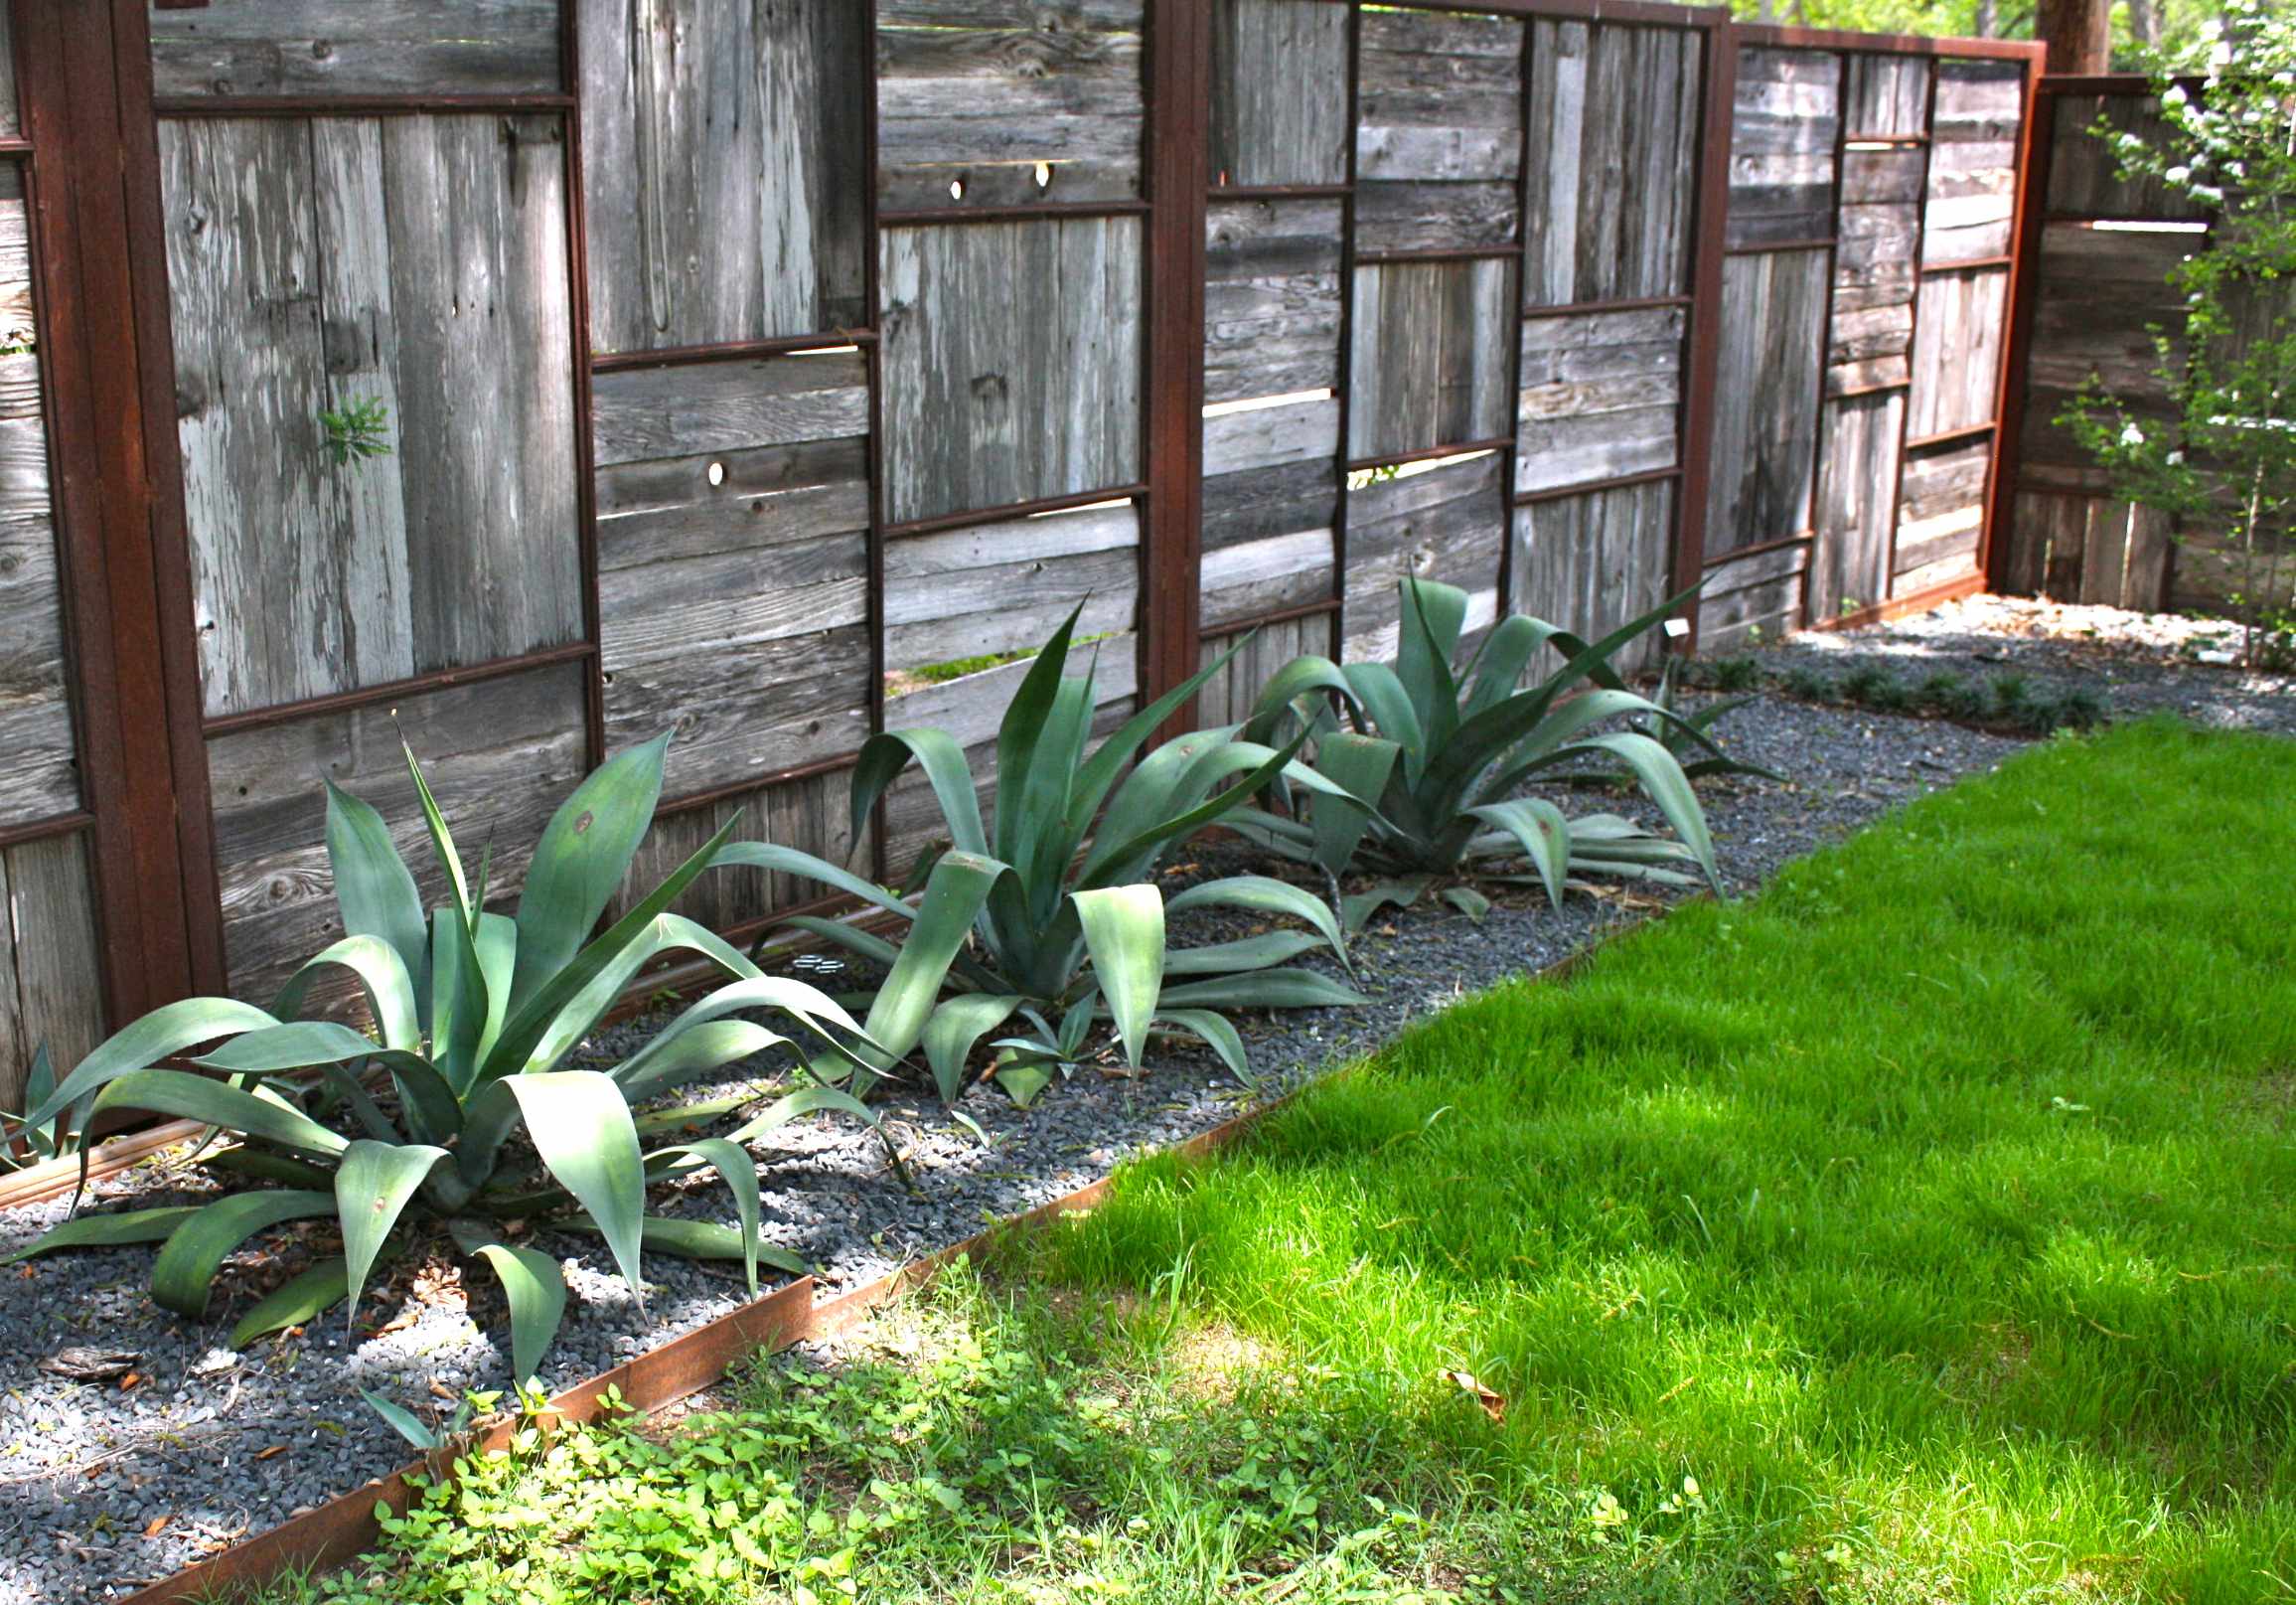
Weathered wood pieces framed in welded steel create a privacy wall and a captivating backdrop for Austin Neal’s garden. (Note to self: In your next life, when you’re a welder, you must remember this.)
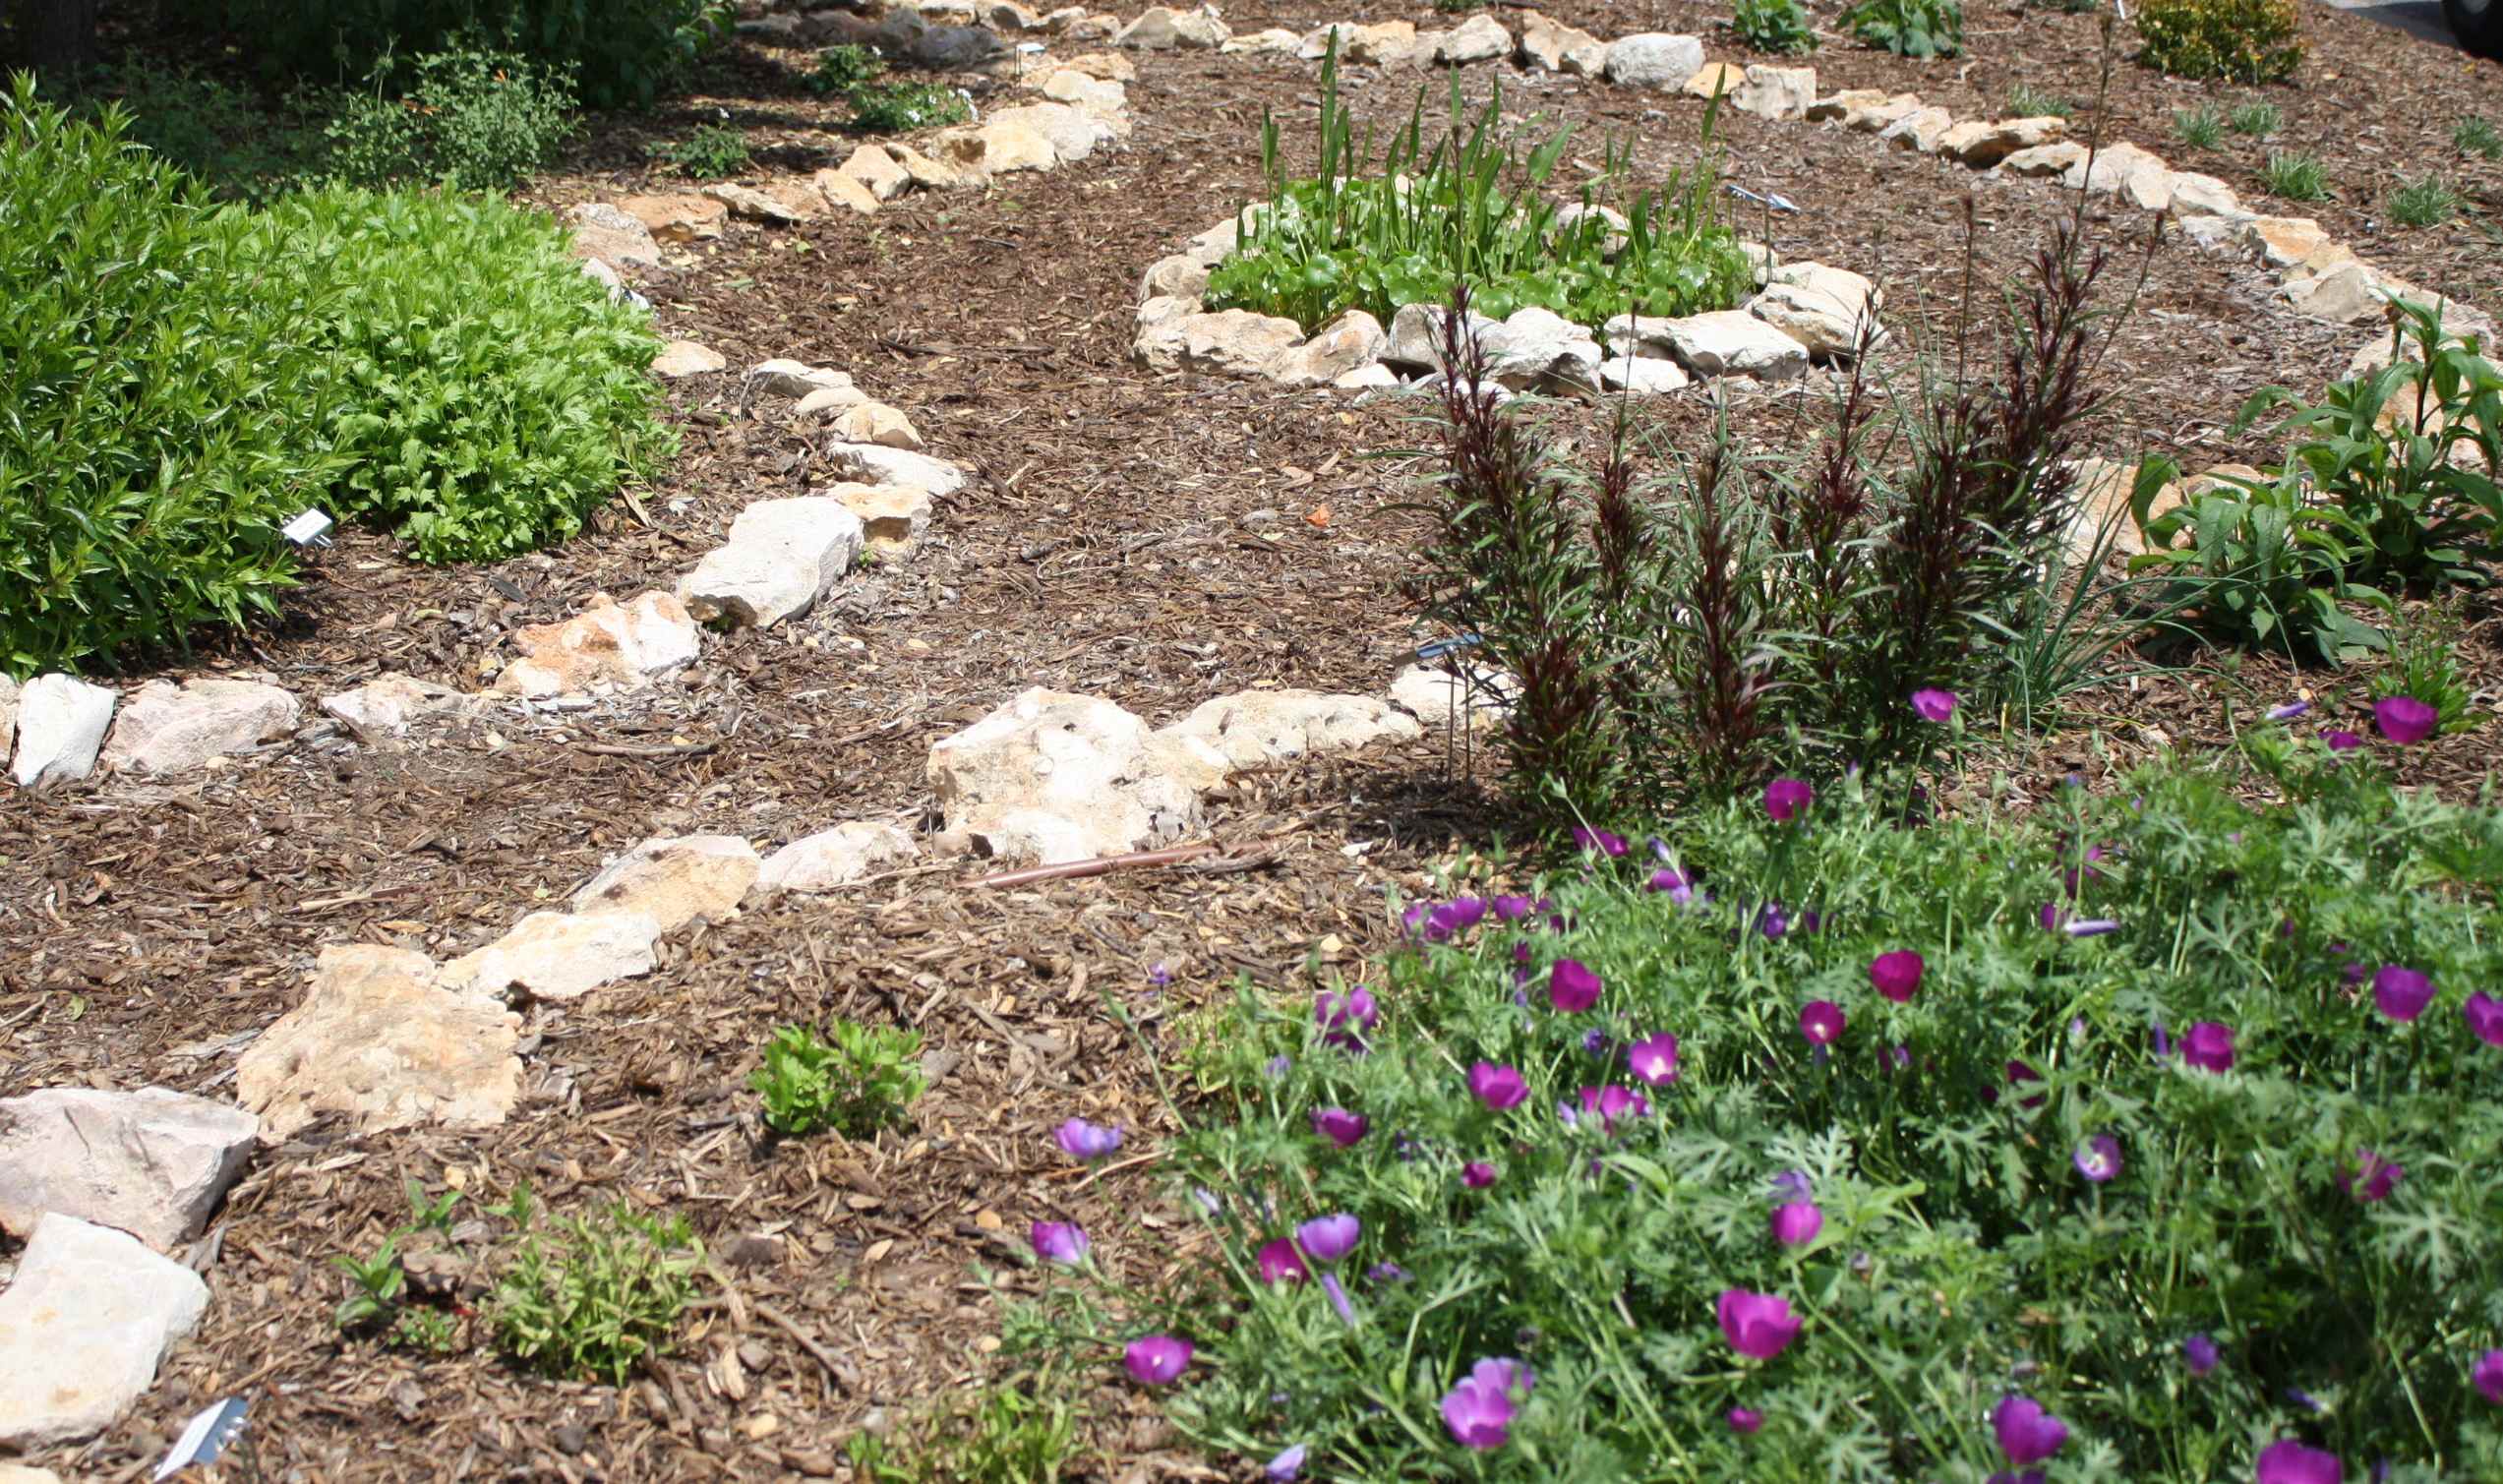
And finally, the Travis County AgriLife Extension demonstration garden is a great example of a DIY garden that makes creative and practical use of native plants, local stones, and mulch — LOTS of mulch (which helps feed the soil while providing a tidy backdrop for plants and rocks.)
Of course, if you go on the tour, you’ll see much more than I’ve pictured here. And it’s only $15 to see all the gardens. The garden addresses, along with a map and more details about the tour are at http://insideaustingardens.org.
You can also pay $5 to see a single garden. If you’re looking for smart and DIY-able ideas to steal for your own garden, and you’re on a tight schedule, I’d recommend Lori or Austin’s garden.
(The tour is being presented by Travis County Master Gardeners Association and the Texas A&M AgriLife Extension Service.)

They’re beautiful and they’re edible. They attract pollinators, they bloom in the shade, and they seem immune to pests and diseases. They’re also adaptable to most soil types and rainfall averages.
But best of all? Texas spiderworts pop up and do their thing every Spring without a bit of help from me.
And yes, I know, Texas bluebonnets do that too, but mostly along the highways. Bluebonnets, which seem to prefer gravelly, poor soil, haven’t adapted well to my Blackland Prairie clay soil. I once tried planting a few in an old caliche driveway, but they didn’t like that either and disappeared after one season.
I don’t think my spiderworts will ever disappear. They don’t seem bothered by anything, no matter how painful: Summer heat (they simply go dormant and come back later when it’s cooler). Drought (somehow they manage to bloom a little even during a dry spring). Seasonally soggy heavy soil (are they wearing little Wellies on their root tips?)
And one more thing: Bluebonnets don’t need any more attention than they’re already getting. Think about that the next time you’re dragging your kids or your dogs around town looking for a photogenic patch of bluebonnets. One that hasn’t been tromped flat by hundreds of other baby- or puppy-toting photographers before you.
Spiderworts need love too.

A final note: Although spiderworts are edible and nutritious, I consider them “emergency backup food.” In other words, they’re far from my first choice when I go foraging in the backyard for something to eat.
The bees in my neighborhood are of a different mind. This morning they were dancing and dipping and diving all around my backyard spiderwort patch. They couldn’t seem to get enough.
So I guess it’s a good thing I’m not terribly fond of the taste of spiderworts.
(Photos are by Renee Studebaker. Do not use without permission.)
For more about the half dozen or so varieties of tradescantia (commonly known as spiderworts) that grow in our area, visit the Native Plant Society of Texas and Lady Bird Johnson Wildflower Center.


Among the tips in my Art of the Almost Perfect Potluck story that appears on the cover of the Life and Food section in today’s Austin American-Statesman is this one: If you have to leave a bowl or plate behind, contact the host and offer to retrieve it later.
Now that I’ve been in possession of this lovely yellow bowl for almost two weeks, I’m thinking I should have added this: If you leave a bowl at a potluck host’s house long enough for her to grow fond of it, offer to give the bowl to the host.
OK, maybe that’s not the most gracious solution, but hey, this is a really cute bowl.
“Gripstand” and “Made in England” are printed on the bottom of it. There’s a small crack on the inside, but it doesn’t appear to go all the way through. And even with the crack, it’s still a nice Gripstand bowl.
I have already made several inquiries among potluck guests, but no one has stepped up to claim it. This is your last chance — if you brought this bowl to my garden potluck dinner on May 19, please contact me soon, or I’m going to consider it a hostess gift from the potluck gods……
The Inside Austin Gardens tour is only two days away, and I’m feeling surprisingly mellow. Yes, my garden is on the tour, and yes, I’m one of the featured speakers that day. And yes, I’ve been incredibly busy getting the garden spruced up and ready for viewing.
So why am I not freaking out? Well, I’ll tell you. But first, a little about the tour:
On Saturday, from 9 am to 4 pm, my garden will be on parade along with six other area gardens chosen by the Travis County Master Gardeners. This is a great chance to get an up close look at the gardening methods and different design sensibilities of a handful of experienced gardeners. This year’s tour focus is edible gardening, a topic near and dear to my heart, so I am thrilled (and honored) to be part of this event. Funds raised from ticket, plant and book sales will help to support the continued good work of the master gardeners of Travis County, a group of hardworking and talented volunteer gardeners dedicated to demonstrating and teaching the art and the science of good gardening. Here’s a link to find out more about the event: http://www.tcmastergardeners.org/what/gardentour.html
And if you missed “Central Texas Gardener’s” pre-tour show and interviews last weekend, you can catch up here: http://www.klru.org/ctg/blog/?p=8372.
OK, so how to explain my Zen attitude despite the fact that about a hundred people (or more!) will be descending on my garden in less than 72 hours? I have a new hard-working, motivational helper (and no, I’m not talking about xanax or adderall) who has inspired me to keep working toward my goal, regardless of the heat, the rain, the chigger bites, the sore back and the occasional “huh?” I get from friends who stop by to see what I’m up to.
Here’s a picture of my little Zen buddy hard at work in the garden:

This is not to say that I’m not grateful for the several hours of real help — weeding and mulching — I’ve received from human friends (thank you, dear friends; you know who you are), but this little fuzzy buddy (who I’ve started calling Bud) is amazing. His work in my garden is all about food gathering — snipping pecan clusters from my tree (and my neighbor’s tree), burying some of the nuts and eating the rest. (Not all that different from what I do with my vegetable and fruit harvests, now that I think about it.)
Bud’s nut clusters usually contain 3 or 4 nuts, but I saw him carry one limb that had six nuts on it. That was the day he stumbled and missed as he leaped from one tree to another. He landed with a big plop on the ground, and the nuts went flying. He snatched up what was left of the little pecan limb (now lighter after losing a few nuts in the fall), looked up at the elusive tree and bounded up the trunk. I couldn’t help but smile — despite the fact that he is slowly but surely stealing all my pecans.
Sidenote: I am not the only one who’s paying extra attention to fox squirrels lately. In a new research project, a team at UC Berkley is documenting all sorts of interesting things about what it means to be a fox squirrel. Fox squirrels are loners, for example, and are apparently quite happy that way. Here’s my favorite part of the study: Using GPS technology, researchers are tracking squirrels’ nut-stashing activities in hopes of learning once and for all how they are able to accurately retrieve so many of their own nuts. So far, about 1,000 nut burial sites have been recorded and mapped. And contrary to popular belief, according to these professional squirrel watchers, these little guys are actually quite good at remembering where they buried their nuts. Researchers think there’s a special cognitive talent not related to a sense of smell that guides their nut recovery missions. Yeah, yeah, I know. I’m a nature nerd. But if you are too, here’s a link to the squirrel project: http://newscenter.berkeley.edu/2012/10/03/squirrelnuts/ The Berkley researchers have also noted that when a squirrel is blocked from something he wants, usually some sort of food, he doesn’t just shrug and walk away. He studies the problem and tries to solve it. Well, yeah, duh. That’s no big surprise to an urban gardener.

Bud is also fond of Swiss chard. Twice I’ve planted yellow chard seeds and twice Bud has nibbled and shredded the seedlings into nonexistence. (He’s no dummy; Swiss chard and pecans taste great together!) But instead of getting pissed, I have been inspired by his great determination and problem solving skills to take action. I purchased several large transplants from a local nursery, planted them, and then covered them with hardware cloth cages, which I secured to the ground with long metal stakes. That was three days ago and so far Bud has left them alone. I don’t think this means necessarily that my problem solving skills are better than his. He may yet revisit the chard and figure out how to get under the cage. I’ll just have to wait and see.
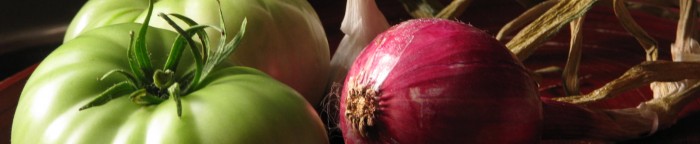
I’m applying the wait and see approach to other parts of the garden too. I have some green heirloom tomatoes on the vine that don’t seem to be attracting any 4-legged attention. And the army worm march across the green bean plants has been averted (squish, squish).
But I know no matter how diligent I am over the next two days, not all of my garden projects will be finished by tour time. And no matter how many army worms I squish, my planting beds will not be bug free. But that’s ok. Just like Bud, I’m willing to hang in there and solve problems as they arise — all for the love of growing and eating good food. Bud and the worms will get some of my harvest, but not all of it.
And finally, although I’m feeling pretty chill about the tour (and my resident squirrel), I can’t quite shake the tiny worry in the back of my brain that a plague of grasshoppers or a freaky hailstorm might swoop in and flatten everything. So just in case, here are a few photos to document how my garden was looking earlier this week:

In the backyard garden, Mexican tarragon is ready to start blooming just in time for the tour.


There’s no place I’d rather be right now than in my garden.
As I’m writing this, I can hear a chorus of birds (warblers, mockingbirds, wrens, and finches) tweeting their little hearts out. They apparently don’t want to be anywhere else either.
I can almost imagine what they’re saying: “Look! Over here! The loquats are getting ripe. And look down there at those fat little caterpillars on the chard and kale leaves. Quick, get ’em! And check out that fountain — it’s FULL of rain water. And that lady who’s always in our yard? She’s finally gone inside to work on her blog. Hurry. She never stays gone for long!”
And now that the big bad drought has taken a break, all the plants are singing too. The chard is taller and bushier than I’ve seen it in two years, the larkspur are giants bursting into brilliant bloom, and the tomato plants are growing so fast and blooming so well that platters of sliced homegrown tomatoes are already dancing in my head. (Sigh) I know it’s too soon to tell exactly what late spring and summer will bring, but for now, I’m feeling nothing but gratitude for the present and hope for the future. And those feelings of renewal and growth are spilling into other parts of my life too. Funny how that happens.
Here are a few scenes from my spring 2012 garden:
Loads of loquats. Biggest crop I’ve ever gotten off this tree. Should be plenty for me and the birds. And even the squirrels.

Thanks to MS at Zanthan Gardens, who passed along Larkspur seed a few years ago, these lovely spring bloomers have been reseeding every spring and spreading all over my front yard and back yard gardens. I love the frilly greenery and the purple, blue and white flowers. I have only a dozen or so blooms now, but by next week I expect to have a hundred or more. (Too bad it’s not edible.)

Larkspur have grown up all around my winter and spring greens, which I don’t mind at all. I’ve decided larkspur looks lovely with vegetables as well as other perennials.
Here it is with red romaine lettuce, which, as you can see, is starting to bolt. As a matter of fact, it bolted right onto my dinner plate last night.

When the larkspur start winding down next month, I should have a bunch of rudbeckia blooms to keep the show going. Every time I look at these young buds, I am filled with happy anticipation.

But here are some little buds that give me an even bigger thrill every time I look at them. Baby red table grapes. Last year’s crop was my first off this 5 yea-old vine, and it was so good and so sweet that I can hardly wait to see what this year’s harvest will bring.

Oh, and another thing. Be sure to check out my story about garden greens in today’s American-Statesman food section (and online at austin360.com) And look for more to come every month or so.
And finally, mark your calendar for Oct. 20 if you want to get an upclose look at my garden and other edible gardens in the Austin area. The Travis County Master Gardeners’ annual Inside Austin Gardens Tour this year will put a spotlight on gardens that combine edible and ornamental plants. More details to come. And probably lots of worrying and fussing from me as I try to make my oftentimes unruly garden (especially in October!) presentable enough for guests.
Happy spring! And happy gardening!
The Blackfoot daisies near the curb in my front yard garden are practically shouting, “Hey, look at me! I’m blooming!”
And apparently I’m not the only one who is appreciating their outbursts. A woman (not someone I know) walking by my house earlier this week got the message loud and clear.
“Wow!,” she said, as she paused in front of the daisies, “I love this!” And then, as she glanced over the entire yard, she added, “I love all of your garden!”
I smiled, and of course gave her a big “Thank You!” And then, much more quietly to myself, I said, “And thank you, spring.”
Yes, spring is indeed busting out all over town, but there’s nothing quite like watching this annual transformation happen in your very own garden. And given the record breaking hard freezes of winter 2010-11 and the extreme heat and drought of summer 2011, I am amazed (and dare I say?) thrilled that my little piece of Central Austin is beginning to feel like my personal paradise again.
Which brings me to another transformation, or restructuring, that is taking place in my world. Instead of working to support my garden habit, I’ve decided to try letting my garden habit be the force behind the work that I choose to support my life. So in addition to free-lance writing and speaking engagements about food gardening, I am now offering my services as a garden coach and garden designer (with an emphasis on edible landscapes); and as an organic gardening teacher, with hands-on Gardening 101 classes soon to be scheduled in my backyard. In addition, I am also organizing occasional private garden supper gatherings featuring performances by buzz-worthy local singer-songwriters, as well as local food (mostly from my garden and entirely prepared by me).
More details on the new garden projects are coming soon, but for now, here are a few images I promised to post for folks who attended the recent edible garden design talk I gave at It’s About Thyme:
Here’s the front yard garden next to the curb in a picture I took a couple of days ago. Flatleaf parsley, Blackfoot daisies, Swiss chard, French thyme, Red Giant mustard, and a volunteer poppy (from passalong seeds from CTG’s Linda L. who got her first seeds as passalongs from Joan H.) that should start blooming by this weekend. The poppies are a deep shade of pink, so deep that in certain lights they look almost red. Check this post from my previous blog at statesman.com for earlier versions of my edible landscape and to see pics of the first year that Joan’s poppies bloomed in my front yard garden.

Here’s a backyard garden scene that includes a variety of leaf lettuces, spinach, larkspur (which has reseeded itself with wild abandon all over my entire garden), and fennel bulb:

Here’s one of my favorite drama queen greens: Red Giant mustard. This easy to grow mustard green adds a bold and beautiful splash of purple to the winter and spring garden and an eye-opening wasabi like bite when used raw in a slaw or sandwich. Or try the raw leaves as a wrap for sauteed pork or tofu.

And here’s a good reason to let at least some of your open pollinated greens set seed before you send them off to the compost pile. These little romaine style lettuces (which popped up from seed thrown off by last spring’s bed of Parris Cos) have proven tough enough to bounce back from the occasional crunch of the mailman’s boot and tasty enough to star in many of my favorite dinner salads.

A final note: As my garden bursts into spring I am reminded that nothing, not the hard droughty times or the lush green times, is set in stone. For that matter, not even stone is set in stone. But on this day, in this moment, my garden is vibrant and hopeful. And I am too.
Happy spring and happy gardening! And come back soon because I have more pictures to post of my everchanging edible landscape.

Milder afternoon temperatures and gorgeous cool mornings are making me smile. And if I’m smiling about the weather, you will usually find me working in my garden at some point in the day. Sure it’s dry, and yeah, it’s still a little too warm out there on some days. And I know the soil in our drought-ridden town is so dead it’s barely able to absorb more than a tiny sip of water on designated watering days. And yes, it is definitely sad and discouraging, but I’m not dead yet, and neither is my compulsion to mend the soil and get something growing in it.
In other words, a gardener’s gotta do what’s gotta be done if he or she wants to continue being a gardener. And given last winter’s killing freezes and this summer’s murderous heat and drought, what’s gotta be done doesn’t fit on one list.
But before I get to my gotta do list, I’d like to thank Austin garden blogger Pam Penick for declaring October “Support Your Independent Nursery Month” and featuring a different nursery in her blog every week. I’m happy to sing the praises of independent nurseries because I can’t imagine be a happy gardener without them. When cooler temperatures gave me the nudge I needed to get my fall garden going, I found a fresh crop of seeds, transplants (vegetables and perennials) and tools ripe for the picking at all of my favorite nurseries. So I’m giving thanks to local independent nurseries by adding their names to a materials source list that I’m compiling as I write about overhauling (and nurturing) my stressed out garden.
If you find you have a few extra dollars for fall seeds or a new drought-tolerant perennial, don’t forget your neighborhood nurseries. I know a lot of local gardeners (myself included) who might start filling rainbarrels with sad, salty tears if any of our favorite nurseries close because of the drought or the economy. All that salty water would not be good for our gardens.
(Find links to what other Austin garden bloggers are saying about homegrown nurseries this month at Pam’s blog.)
And now back to my gotta do list. First on the list is to revive the soil. When the soil is so dry and barren that it sheds water instead of absorbing it, planting fall seeds or transplants is risky business. In dry dusty soil, the microbes that support healthy plant growth have either died or gone dormant because they have no food or water. Also of great concern to me (in part because I recently read “The Worst Hard Time”) is that soil too dead to support any kind of plant life has nothing to hold it down when the wind blows hard or when a heavy rainstorm blasts through town (as one surely will at some point in the future).
The best way to help the soil is to feed the microbes and entice earthworms and other beneficial deep soil dwellers to venture up into the topsoil layers. To that end, I’ve been gently mixing organic materials into the top two inches of soil — partially decomposed leaves and slightly chunky (unsifted) homemade compost. To stretch my homemade compost, I’m mixing it with some Back to Nature Cotton Burr Compost (coarse).
And finally, every bed is getting at least two inches of mulch on top of the compost layer and lots of careful handwatering, even if there are no plants in the bed. The microbes won’t thrive (or excrete plant nourishing byproducts) until the soil can hold some moisture.

And therein lies the rub. I’ve had a heck of a time getting my tired and dried out garden soil (example of dead soil in photo above) to hold any moisture — even after digging in compost and leaf mould. I’m sure I’m not the only gardener who has been standing around for what seems like forever watering, watering and rewatering a particularly dead patch of bare soil only to find that the moisture hasn’t penetrated at all. (Where did the water go? Is there a hidden crack or crevice somewhere that’s filling up with hose water?)
I finally had to use extreme methods to moisten the soil enough for fall vegetable seeds and perennial transplants. Using a fork I scratched the surface of the soil and sprinkled with water. After it soaked in, I scratched the same spot again, and watered again. I kept repeating until scratching the soil no longer revealed dry patches. Finally, the soil started absorbing (instead of repelling) the water.
You can test to make sure your soil is absorbing all the water you’re giving it by poking your finger down about two or three inches into the bed. If your finger finds dry soil, you need to keep watering. If you pick up a handful of soil, squeeze it, and at least some of the soil particles stick together, you know you’re getting somewhere.
When your bed is well moistened, cover it with mulch (wood chips, pine needles or chopped leaves). When you’re ready to plant, push the mulch off to one side long enough for seeds to germinate and transplants to take hold. Then replace the mulch, but leave a little breathing room around the plant stems. And if afternoon temps reach into the 90s again, consider stretching shade cloth or row cover above your beds to help keep the ground cooler.
 In the past week, after a round of intensive watering and topping the soil with compost and mulch, I planted kale and mustard transplants and sugar snap pea seeds. The seeds germinated in a few days, and now, a week later, some of the seedlings are taking off. (Big sigh of relief.)
 Last month, after two tries, my lima bean seeds finally sprouted. They’re starting to bloom now, so I may squeak in under the first freeze with a bean harvest. The birds ate the first lima bean sprouts of the seeds I sowed in July. After that, I started setting out bird seed. The birds are happier now, and so am I
Sources for materials mentioned in this post:
Mustard and Kale seedlings: Breed and Company, The Great Outdoors
Lima Bean and Snap Pea seeds: The Great Outdoors
6-pack of broccoli transplants: Barton Springs Nursery
Shade cloth, row cover: The Natural Gardener
Back to Nature Cotton Burr Compost (both fine and coarse versions), Barton Springs Nursery
Stay tuned for more about fall garden projects and plantings, including a minor miracle: yellow squash plants that have not been decimated by squash vine borers.
And smile! It will rain again some day.
—
Photos by Renee Studebaker/Do not use without permission

The last day of summer 2011 is Sept. 23, unless you’re going by meteorologists’ summer, which ended the last day of August. Either way you look at it, summer isn’t over yet. But the bigger question in my mind (and probably yours too) is when is the last day of this drought?
Perhaps you’ve heard that this summer in Texas, June, July and August were the hottest three months ever recorded in the history of the United States. And that the record was formerly held by Oklahoma during the Dust Bowl in 1934. Not happy news.
Gardening in Central Texas has never been easy, but this is getting ridiculous. Will it ever rain again? Do we really have to turn into San Angelo? Should I start making plans to move to Portland? Are my pecan trees going to die? Will I ever feel at peace in my garden again?
This is sounding a little whiny, I know. Perhaps I’m suffering from heat exhaustion. Or perhaps I’m momentarily stuck in Stage 2 of …. THE FIVE STAGES OF GRIEVING ABOUT CLIMATE CHANGE IN AUSTIN (with apologies to Elsabeth Kubler-Ross)
1. DENIAL: “My garden is fine. I don’t have to panic because this drought can’t last much longer. It will rain soon. I know it will. And besides, some people think climate change is just a hoax. Maybe they’re right. I’ll just go buy something fresh and new to plant in all those empty spaces.”
2. ANGER: “Why Austin? Why not Portland? Or Seattle? How come they get mild summers and all that rain? Where’s our share? It’s not fair. One of my stressed-out pecan trees is dropping limbs. I don’t want a garden full of nothing but cactus and agaves. I want to scream.”
3. BARGAINING: “What can I do to get more water for my vegetables and fruit and nut trees? Dig my own well in the backyard? Call in the Greywater Guerillas? Maybe a nongardening neighbor would let me run his water hose to my garden on his designated watering day. I could trade him water for squash and beans.”
4. DEPRESSION: “I’m so sad. What’s the use of gardening? Everything burns to a crisp. I’ll just buy produce from Wal-Mart. What’s the point of growing vegetables in a desert? I don’t even feel like cooking. I’ll just open a can of something. Who cares if it’s tainted with BPA and Carbaryl. We’re about to smother in a big bowl of dust.”
5. ACCEPTANCE: “It’s going to be OK. Even if Austin IS turning into a desert, it doesn’t have to become a dust bowl like THE Dust Bowl, and I don’t have to give up gardening. Some deserts are nice. I can learn to use more desert-friendly growing methods. Gardeners in Tucson (with an average annual rainfall of only 12 inches) grow vegetables, right? And dryland farming methods are being explored all over the world. At the very least, I can try sunken beds with mulch-filled trenches and ollas — and then maybe I won’t have to stand for so long in the heat holding a water hose. And more shade. Definitely more shade. And maybe even aquaponics. Hmm… with a tilapia-stocked aquaponics system, I might go back to eating fish more often.”
OK, so you get the idea. I’d like to report that I’ve worked through the stages and am now residing comfortably in Stage 5. But no, I’m not quite there. Last week, the cooler temps made it easy to jump to Stage 5, but with the temperatures climbing above 100 again this week, I’ve got some Stage 2 grumpiness coming on. That said, I’m feeling optimistic enough that I’m about to set out broccoli and kale transplants (under shadecloth). And I may even try to direct seed some Swiss chard and snap peas later this week. But if the squirrels dig up my moist seed beds and ruin my efforts, I might revisit Stage 4. I’ll spread some chicken wire over the seedbed, stake it down and cross my fingers.
I guess what it all comes down to is this — if you’re a gardener, you’ll figure out a way to garden.
My grandparents managed to get by during the Arkansas drought of 1930-31. Those years were also the beginning of the Great Depression. They hauled well water to a small vegetable plot, raised guineas, hunted small game (mostly squirrel), and ate a lot of cornbread, pinto beans and salt pork.
So in the spirit of doing what you can to get by (and sometimes even thrive) no matter the weather or the economy, here’s a selection of recipes I’ve been working on using what’s still alive in my summer garden (peppers, amaranth, arugula), what’s keeping well from the spring garden (butternut squash, garlic), plus crunchy Kieffer pears (from Lightsey Farms) and wild hog (from Sebastian Bonneau at Countryside Farm). Lightsey should have Kieffers through September and maybe longer. Bonneau almost always has wild hog for sale a the Farmers Market downtown (4th and Guadalupe).
Drought Friendly Recipes for the New Recession (or the New Expansion, or the New Climate, or whatever happens first):

Pan Fried Wild Hog Chops with Ginger and Garlic
1 Tbsp soy sauce
1 Tbsp toasted sesame oil
2 Tbsp rice cooking wine
2 tsp minced garlic
2 Tbsp peanut oil
1 tsp minced serrano pepper
1 tsp minced fresh ginger
1/2 tsp Chinese chili paste (or cayenne powder)
1 tsp brown sugar
Salt and pepper to taste
1 rack of wild pork, sliced into 1-inch thick chops, 6-8 chops (or substitute farmed pork chops)
1 tsp coarsely flaked sea salt (optional)
In a mixing bowl, combine first 8 ingredients. Add chops and turn a few times in the marinade to coat. Cover and refrigerate for 1 hour, or up to 8 hours. To cook: Heat a well-seasoned flat-bottom wok or stainless steel skillet and then add about 2 Tbsps peanut oil. Place chops, two or three at a time, in hot pan and sear over medium high heat. Do not crowd. When well browned, turn and brown other side. Then reduce heat and cook for a few more minutes or until meat is cooked medium well (internal temperature of 150 degrees). If using a touch test for doneness, the meat should be firm, but with a slight yield. (Some cooks serve farmed pork medium or medium rare, but to be on the safe side, I like to cook wild pork until it is done, but not a second longer.) Allow the meat to rest for a few minutes before serving. Scatter sea salt lightly over chops. Serves 6-8, depending on size of rack.

Curried Butternut Squash and Keiffer Pear Hash Browns
3/4 cup butternut squash, grated (see notes)
1/3 cup Kieffer pear, grated (or substitute crisp Asian pear)
1/3 cup onion, grated
1/4 cup yellow or orange bell pepper, grated
1 or 2 ripe red serrano peppers, minced
2 generous dashes of curry powder
1/2 tsp minced fresh garlic
Salt and pepper to taste
1 large egg
1 Tbsp flour (optional)
Enough vegetable oil for frying
Press and squeeze grated ingredients between kitchen towels or paper towels until dry. In a mixing bowl, whisk together egg, flour (if using), curry powder, garlic, serrano, salt, and pepper. Gently stir in squash mixture. Add a drizzle of oil to a hot stainless steel skillet. Place small scoops of mixture in pan and gently press to flatten to about 1/4 inch thick. Don’t crowd patties in the pan. Cook over medium high heat until well browned; then carefully turn with spatula and brown other side. (If pan seems dry, drizzle in more oil before turning.) Slide hash browns out of pan and onto a plate. Serve immediately or place in a warm oven until serving time. Makes 6-8 small hash brown patties
Notes: When grating, for best texture, use the largest holes on your box grater and press the full length of grater so squash strands are longer. Flour helps the mixture bind and hold together better while cooking. Without flour, the hash browns will be looser, but gluten free. If your basil hasn’t burned up, shred a few leaves and use as garnish.
Arugula and Pear Salad with Honey Lemon Thyme Dressing
1 tsp honey, more or less to taste
Juice of 2 lemons, about 1/4 cup
1/2 cup extra virgin olive oil
1 tsp fresh thyme leaves, chopped
1tsp Dijon mustard
1 clove garlic, smashed and minced
Generous pinch of salt, or to taste
1 or 2 Kieffer pears, peeled and sliced in thin wedges (or substitute crisp Asian pears)
Arugula, washed and dried
Whisk together first six ingredients and set aside. Arrange arugula on salad plate, top with a handful of pear slices. Drizzle lightly with dressing. Leftover dressing will keep in the fridge for at least a week.
Note: If your Kieffer pears seem too hard, let them sit out on the kitchen counter for a few days and they will ripen. Arugula will make it through most summers if you give it plenty of afternoon shade, or all day dappled shade. It will, however, become even spicier in the heat. Which makes it just right for pairing with with crisp pears and slightly sweet vinaigrette.
Amaranth Greens with Sesame, Lime and Garlic
1/4 cup raw sesame seeds
1-2 cloves garlic, smashed and minced
About 2 cups amaranth leaves, washed and dried
Salt and dash (or two) of cayenne pepper
1 lime
Olive oil
Heat a stainless steel skillet (or well-seasoned cast iron skillet) and toast sesame seeds over medium low heat until brown, stirring often. Remove seeds and set aside. Add splash of olive oil to hot pan, add garlic and cook for about 1 minute or less, and then add amaranth leaves, garlic, salt and cayenne. Stir and cook over medium high heat for just a couple of minutes, or until greens are lightly seared and wilted. Serve with squeeze of lime juice and sprinkling of toasted sesame seeds.
Note: The Tricolor Amaranth (in the top photo) have been hanging tough in my summer garden. Of course it helps that they get only about 3 hours of direct sun. Most of the day they’re in dappled sun or bright shade. During a drought, in order to look and taste their best, most species of Amaranth, including the Tricolor, will require some handwatering between designated watering days.
Easy Pear and Pepper Chutney
About 1 1/2 cups Kieffer pear, peeled and sliced in thin wedges
2 or 3 ripe red serrano peppers, seeded and julienned
1/2 cup onion, sliced thin
1/2 cup brown sugar, or more or less to taste
2 Tbsp organic corn syrup
3/4 cup water
1/2 tsp cinnamon
1 tsp salt
1 Tbsp lemon juice
3 Tbsp apple cider vinegar
Place all ingredients in a large sauce pan or skillet. Bring to slow boil, stirring occasionally. Reduce heat to simmer and cook until pears soften a bit and water reduces to about 1/4 cup. If pears seem too firm, add more water and cook a little longer. Serve with wild pork chops.
* For more about Kieffer pears (and more recipes) check out this piece I wrote 2 summers ago for the American-Statesman.
Recipes and photos by Renee Studebaker/Do not use without permission


